I decided that the best way to apply to a PC game maker was to create a box the same size and shape of a PC game box and include the resume inside as the ‘instruction manual.’
For this project I used the following materials, feel free to substitute if you’re following along at home:
1 Computer
1 Old Game Box
1 [EvL]exitzer0
1 pizza
1 2L bottle of Mt. Dew
1 Photoshop
1 Kinko’s
1 Post Office
1 Tape Measure
1 X-Acto Blade
1 Glue Stick
1 Roll of Clear Tape
1 Sharpie
1 Digital Camera
1 Pizza Cutter
1 Resume and Cover Letter
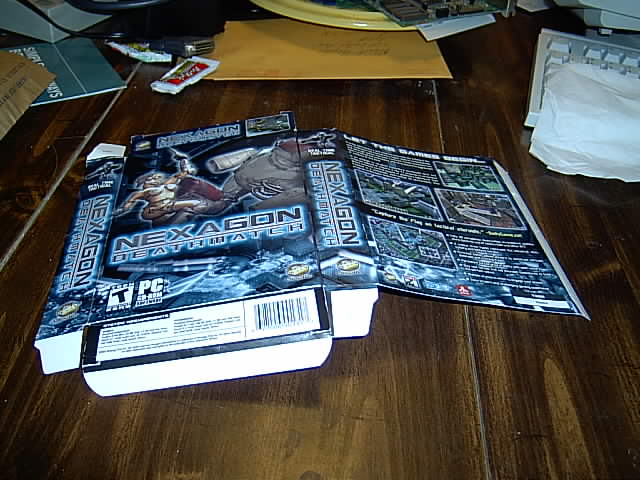
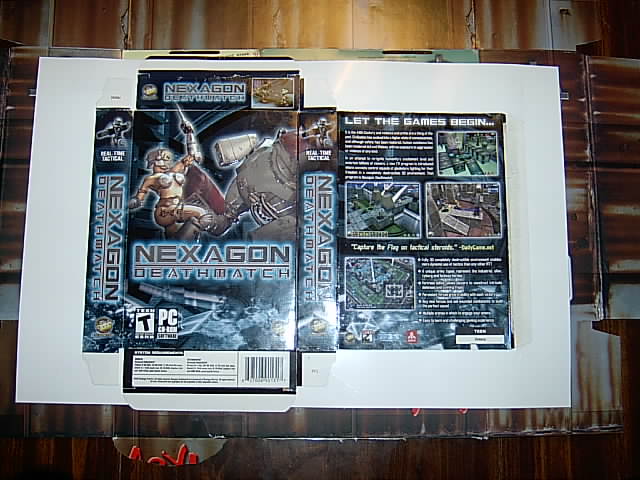
One of the first things I had to do was to make sure what size my box image would be, and for that I sacrificed the box from one of the worst games I own, Nexagon Deathmatch. I disassembled the box and determined that I needed to make an image that was about 10 by 13 inches, making allowances for the flaps and folds. I didn’t make allowances for the front flap that a lot of game boxes have for a couple of reasons, but it was mostly because Kinko’s wasn’t able to print on anything bigger than 11 by 17 inches.
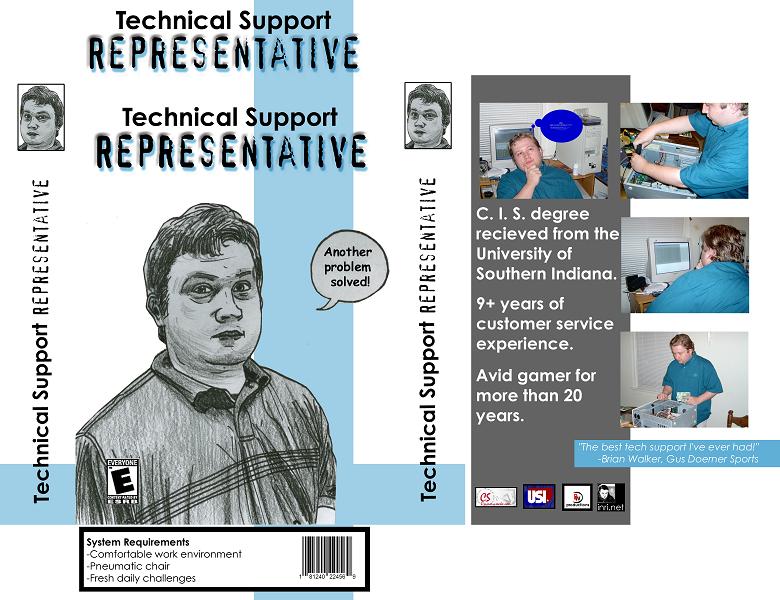
After I took my measurements, I contacted a friend who knows much more Photoshop alchemy than I do. We decided ahead of time that payment would be some pizza from a local place and some Mt. Dew. With that out of the way, we got down to work. We pulled together an hand drawn portrait of me courtesy of the fine folks at I.N.R.I.net, got a few ‘action shots’ of me with the digital camera, and tossed around a few ideas and after several hours ended up with a finished product.
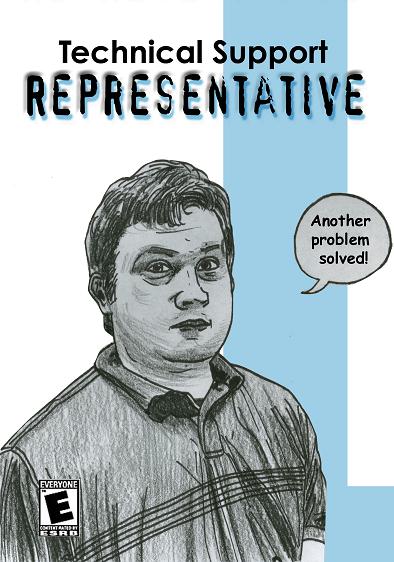 Any job seeker should have at the very least a generic resume ready at all times that can be tailored to whatever specific company you are sending it to. I took my existing resume, shrunk the pages down to 5 by 7 inches, adjusted page breaks so that each section of my resume was on a different page and cropped the box so that I had an appropriate cover image.
Now that we did all the prep work, including checking the resume for typos and errors, it’s time to go off to the printers!
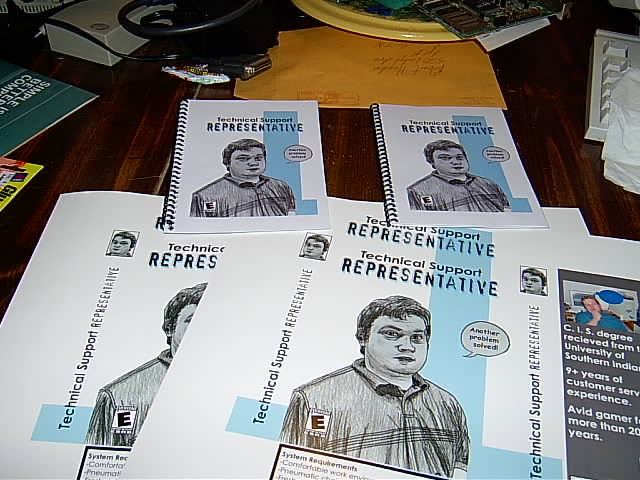
I decided to go to Kinko’s because they claim that they can print out just about anything on just about anything. For the box, I picked out the biggest heaviest glossy paper that they had in a bright white. For the manual, I had them use their normal paper, cut down to size, spiral bound, and add a clear plastic cover and a black vinyl back. They were kind of busy when I went in, so it took them about two and a half hours, but the results were very satisfactory.
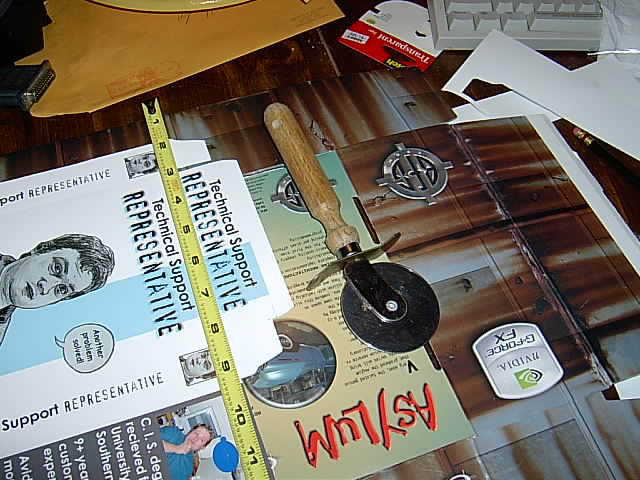
After picking up the printed materials, I brought them home and lined up the old Nexagon box with the printout of the new box, taped it down and traced the outline with the X-Acto knife. This got the picture down to the exact shape I needed to assemble the box.

The hardest part was figuring out how I was going to fold the box, and how to keep the folds straight since I was really only going to get one shot at this. I figured that the best way to get the folds correct was to use a tape measure as a guide and roll down the side of the tape with a pizza cutter to score the edge and make a perfect fold. It worked like a charm. Then I just glued the loose edges together, waited a few minutes, and then had a completed box on my hands.
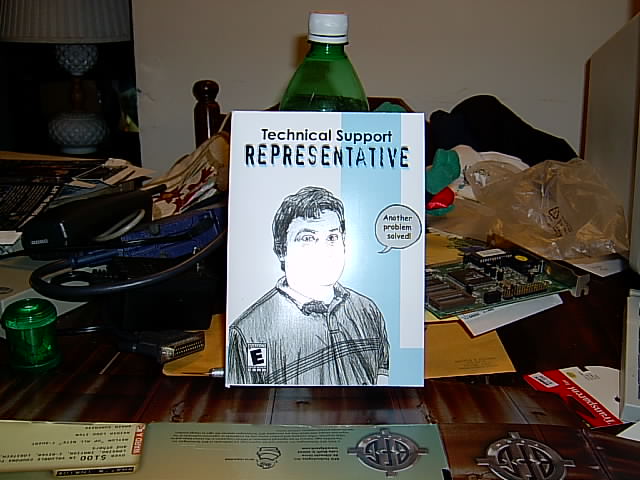
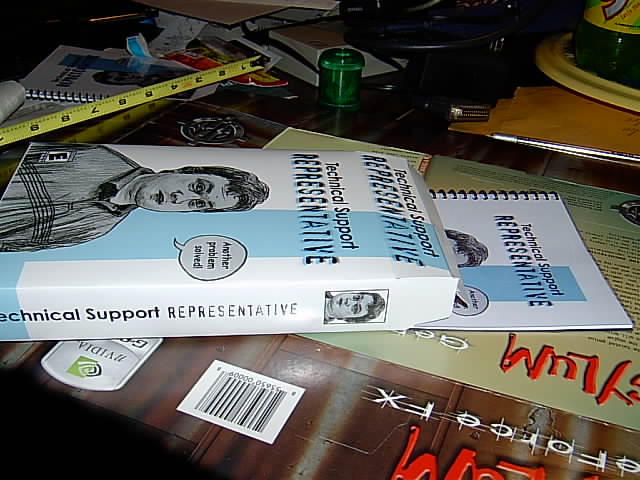
Completed box front
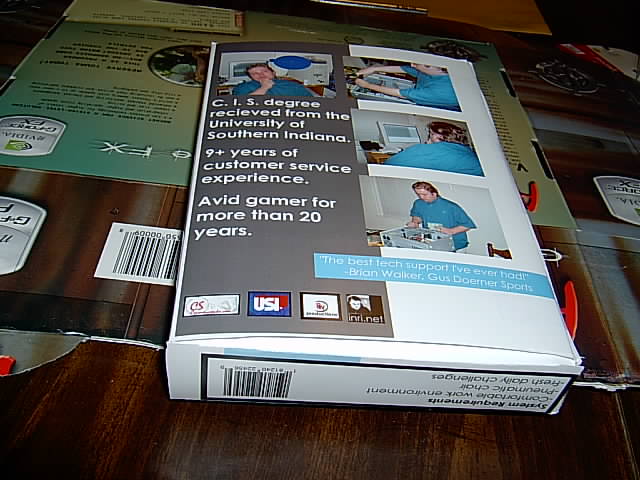
Completed box back
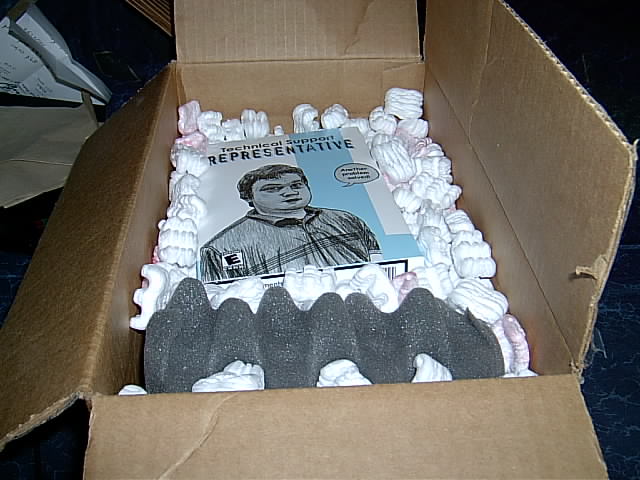
All that was left to do was to see if the manual fit in the box, pack it up, and mail it off. I opted for the 2-3 day Priority Mail and got it off to the proper people. Now I just have to wait it out and see if I hear anything back on it. I’ll keep this space updated with the latest happenings.